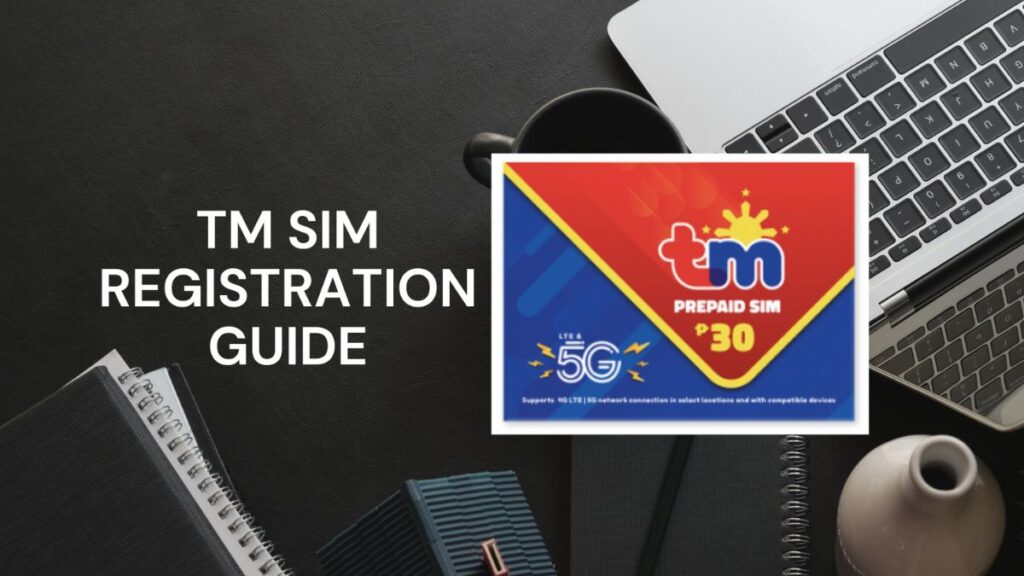
Hey there! Have you recently bought a new TM SIM card? Or maybe you have been using your trusty TM number for years and just need to make sure it is officially yours? Well, you have come to the right place. Today, we are going to talk about something very important: registering your TM SIM card. The law now requires everyone to register their mobile numbers. This helps keep us all safe from bad people who send scam texts. Do not worry, the whole process is actually really easy and fast. All you need is your phone, a good internet connection, your ID, and the TM SIM card registration online link. Once you click that link, you will be on your way to securing your mobile number forever. In this guide, I will hold your hand and walk you through every single step. By the end of this article, you will know exactly what to do. So, grab a snack, sit back, relax, and let’s get started on your SIM registration journey!
You might be wondering, what is in it for me besides following the law? Well, registering your SIM card opens the door to lots of fun and exciting rewards. TM, which stands for Touch Mobile, is known for giving its users awesome deals. Once your SIM is fully registered and activated, you can start texting, calling, and browsing the internet without any worries. You can even sign up for the popular TM AN20 Promo, which gives you unlimited calls and texts to all networks plus some data to surf the web and use your favourite apps for a very low price. Being a registered user means you never have to miss out on these great offers. Plus, you will never have to worry about your number getting turned off. You can keep chatting with your friends, watching funny videos online, and calling your family. Now that we know about the cool perks, let’s dive deeper into why this whole registration thing is a really big deal for everyone.
Why Do We Need to Register Our TM SIM Cards?
Have you ever received a text message from a stranger telling you that you won a lot of money? Or maybe a message asking for your bank details? These are called text scams, and they are very annoying and dangerous. For a long time, bad people could buy a SIM card, send thousands of scam messages, and then just throw the SIM card away. Nobody knew who they were! Because of this, the government decided to make a rule. They said that every single person who owns a SIM card must tie their real name and face to it.
This is the main reason why we need to register. By registering, you are helping the police catch the bad guys. If someone tries to scam you, the phone companies can look up their registered name and stop them. So, registering your TM SIM card is not just about following a rule. It is about protecting yourself, your family, and your friends from people who want to steal from you. It makes using our cell phones a lot safer and much more fun.
What Exactly is the SIM Registration Law?
Let us talk a bit more about the law itself. In the Philippines, this rule is officially called the SIM Registration Act. It is a very important law that was signed to make sure all mobile phone numbers are accounted for. Think of it like getting a license plate for a car. You cannot just drive a car without a license plate, right? The government needs to know who owns the car in case there is an accident.
Your SIM card is the same thing. The law says that all phone companies, like TM and Globe, must collect the real names, addresses, and ID photos of their users. The law is very strict about protecting your privacy, too. You might be worried that people will see your personal information. But do not worry! The law also says that the phone companies must keep your data locked up safe and sound. They cannot share it with anyone unless a judge in a court says they have to. So, the law does two things: it stops bad guys, and it protects your secret information.
What Happens If You Do Not Register Your TM SIM Card?
This is a very important question. What if you just ignore the rules and decide not to register your TM SIM card? Well, the simple answer is that you will lose your number. If you have an old SIM card that you never registered, the phone company will eventually deactivate it. Deactivate is just a fancy word that means they will turn it off forever.
If your SIM card gets turned off, you will not be able to make phone calls anymore. You will not be able to send text messages. You will also lose your mobile internet data. But wait, it gets worse! Think about all the things connected to your phone number. Your social media accounts, like Facebook and TikTok, use your number. Your online wallets, like GCash, use your number. If you lose your number, you might get locked out of those apps! You would lose your money in your e-wallet and your connection to your friends online. That is why it is super important to register before it is too late.
Who Really Needs to Register a TM SIM Card?
You might be thinking, “Does this rule apply to me?” The answer is a huge YES! Every single person who uses a TM SIM card needs to register it. It does not matter who you are or how long you have had your SIM card.
- New Users: If you just bought a brand-new TM SIM card from the store today, it will not work until you register it. It is completely locked. You have to register it first to turn it on.
- Old Users: Even if you have been using the exact same TM number for ten years, you still have to register it. Your long history does not let you skip the rules.
- Kids and Teenagers: If you are under 18 years old, you cannot register it under your own name. But your parents or guardians have to register it for you using their names.
- Visitors from Other Countries: Even tourists who are just visiting the country for a few weeks to go to the beach must register their temporary SIM cards.
Basically, if there is a SIM card inside your phone, it must be registered!
The Ultimate Checklist: Things You Need Before You Start
Before we jump into the actual steps, we need to prepare. You do not want to start the process and realize you are missing something important. It is like trying to bake a cake without having any eggs! Here is a simple checklist of everything you need to gather before you start registering:
- Your Smartphone: You need a working phone that can connect to the internet and take clear pictures.
- Your TM SIM Card: The SIM card should be inside your phone so you can receive text messages.
- A Good Internet Connection: You can use Wi-Fi or mobile data. If you use mobile data, TM usually lets you access the registration website for free!
- Your Valid ID: You need an official ID card given to you by the government. We will talk about which ones are okay in the next section.
- A Well-Lit Room: You will need to take a selfie, so find a room with nice, bright lighting.
Once you have all five of these things, you are completely ready to go!
What IDs Are Accepted for TM SIM Registration?
To prove that you are really who you say you are, you must show a valid ID. A valid ID is an official card made by the government that has your name, your picture, and your personal details on it. You cannot just use a library card or a gym membership card. The government has a strict list of IDs they will accept.
Here are some of the best IDs to use:
- Philippine National ID (PhilSys ID): This is the best one to use if you have it.
- Driver’s License: Given by the LTO.
- Passport: Your official travel book.
- Voter’s ID: The card you use when you vote for the president.
- SSS ID or GSIS ID: IDs from your job benefits.
- PRC ID: For professionals like teachers and nurses.
- Senior Citizen ID: For our lovely grandparents.
Make sure your ID is not expired. If the date on the card says it is expired, the system will reject your application and you will have to start all over again.
What If You Do Not Have a Valid ID?
This is a very common problem, especially for students or young adults who have never had a formal job. What do you do if you look at that list of IDs and realize you do not have any of them? Do not panic! There is still a way for you to register your TM SIM card.
If you are a student, some schools give out official Student IDs that might be accepted, but it is better to ask an adult for help. If you are under 18 years old, the law says you must register your SIM card under your parent’s or legal guardian’s name. This means your mom or dad will use their own valid ID to register your number. They will also need to give their permission. Once you turn 18 and get your own government ID, you can easily change the registration details to your own name later on. So, just ask a trusted adult in your family to help you out!
How to Take a Really Good Photo of Your ID
During the online registration, you will be asked to upload a picture of your valid ID. A lot of people fail this step because they take a messy or blurry picture. If a computer cannot read the words on your ID, it will say “Error!” and make you try again. Let us learn how to take a perfect photo of your ID.
First, put your ID flat on a table. Do not hold it in your hand because your fingers might cover important words. Next, make sure there is plenty of light, but watch out for glare. If the light bounces off the shiny plastic of your ID, it will create a big white spot, and the camera will not see your face. Try moving the ID away from direct sunlight or turning off your camera’s flash. Finally, hold your phone steady directly above the ID. Make sure all four corners of the ID are inside the camera frame. Tap the screen to focus, and snap the picture!
How to Take the Perfect Selfie for Verification
After you take a picture of your ID, the system needs to prove that you are the same person in that ID picture. It will ask you to take a selfie. But this is not a fun selfie for Instagram! This is a serious, official selfie.
Here is how to do it right. Find a plain background, like a blank wall in your house. Stand facing a window so the natural light hits your face. This makes your face look clear and bright. Do not stand with your back to the window, or your face will look like a dark shadow. Before you take the picture, take off your sunglasses, your hat, and even your face mask. The computer needs to see your entire face, from your forehead down to your chin. Look straight into the camera lens on your phone, keep a straight face or give a tiny smile, and take the shot. Make sure the photo is not blurry!
Step-by-Step Guide: Registering Using the Official Website
Now that we have all our pictures and details ready, let us actually do the registration. The most common way to register is by using the official TM website. This is a great choice if you are using a computer, a tablet, or just your phone’s web browser. Follow these simple steps carefully:
Step 1: Go to the website. Open your browser (like Chrome or Safari) and go to the official registration page. Make sure it is the real TM or Globe website so you do not get scammed.
Step 2: Type in your number. You will see a box asking for your 10-digit TM mobile number. Type it in slowly.
Step 3: Enter the OTP. After you type your number, the website will send a text message to your phone. This message has a secret 6-digit code called an OTP (One-Time PIN). Type this code into the website to prove you have the phone with you.
Step 4: Fill out the form. Now, type in your full name, your birthday, your gender, and where you live. Double-check your spelling!
Step 5: Upload your pictures. Click the button to upload the clear picture of your ID and the perfect selfie you took earlier.
Step 6: Review and submit. Look at all the information you typed. If everything is correct, tick the small box that says you agree to the rules, and click the big “Submit” button.
Once you are done, the screen will show a long reference number. Take a screenshot of this number! It is your proof that you finished the process.
Step-by-Step Guide: Registering Using the GlobeOne App
Did you know there is another way to register? TM is part of the Globe phone network, so you can also use the handy GlobeOne App. This app is amazing because it keeps you logged in and makes everything super fast. If you prefer using apps instead of websites, this is the best way for you.
Step 1: Download the app. Go to the Google Play Store or the Apple App Store and search for “GlobeOne.” Download it to your phone.
Step 2: Create an account. Open the app and create a new account using your TM mobile number.
Step 3: Find the registration button. On the main screen of the app, you will see a big banner or button that says “Register Your SIM.” Tap on it.
Step 4: Follow the instructions. The app will guide you through the exact same steps as the website. You will fill in your name, birthday, and address.
Step 5: Use your camera. The app will ask permission to use your phone’s camera. You can take a picture of your ID and your selfie right inside the app!
Step 6: Finish up. Submit your details, wait for the loading circle to finish, and take a screenshot of your success message. The app makes it really simple and smooth.
Special Rules: How to Register If You Are a Minor
We talked a little bit about kids and teenagers earlier, but let us look closer at the exact steps. The law says that anyone under 18 years old is called a minor. Minors are not allowed to sign official government contracts yet, and registering a SIM card is a type of contract.
If you are a minor, you cannot put your own name on the registration form. Instead, you must ask your parent or a legal guardian to do it. When you get to the part of the form that asks “Who is registering this SIM?”, you must choose the option for a parent or guardian. Your parent will then type their own name, their own birthday, and their own address. They will upload a picture of their valid ID and take a selfie of their own face. They will also have to check a special box that says they give you permission to use the SIM card. Do not try to lie about your age, because the computer will know when it checks the birthday!
Special Rules: How to Register If You Are a Tourist or Foreigner
The Philippines is a beautiful country, and thousands of tourists visit every year to see the beaches and mountains. Tourists need cell phones too! But the law applies to everyone, even visitors. If you are a foreigner buying a TM SIM card for your vacation, the rules are slightly different for you.
Tourists cannot use a local Philippine ID because they do not have one. Instead, you must use your Passport as your official ID. The registration form will ask you to upload a clear picture of your passport. But that is not all! You must also show proof of where you are staying, like a hotel booking receipt. Most importantly, you have to upload a picture of your return airplane ticket. The government needs to know when you are going back to your home country. Because tourists are only visiting, their TM SIM cards are only valid for 30 days. After 30 days, the SIM card will turn off automatically. If you live in the Philippines permanently as a foreigner, you need to show your Alien Certificate of Registration to get a permanent SIM card.
Common Mistakes to Avoid During Registration
Even though the process is easy, people still make silly mistakes. Let us talk about these mistakes so you can avoid them and finish your registration in five minutes flat!
The most common mistake is typos. A typo is when you accidentally press the wrong letter on your keyboard. If your name is “Maria” but you accidentally type “Marai,” the system might get confused when it looks at your ID. Always read your answers twice before hitting the submit button.
Another big mistake is uploading huge photo files. If your camera is set to super high quality, the picture file might be too big for the website to handle. The website usually only accepts pictures that are smaller than 4MB. If your picture is too big, the screen will freeze. You can fix this by taking a screenshot of your picture to make the file size smaller. Lastly, do not rush! Take your time to fill out every single blank box. If you skip a box, the website will not let you move forward.
Troubleshooting: What to Do If Things Go Wrong
Sometimes, technology gets a little crazy and things do not work perfectly. If you run into trouble while registering, take a deep breath. Here are some simple ways to fix the most common problems.
Problem 1: The OTP is not arriving. You typed your number, but your phone is not getting the secret text message.
Fix: First, check if your phone has a signal. If you have zero signal bars, the text cannot reach you. Move near a window or go outside. If you have a signal, wait for 60 seconds and click the “Resend OTP” button. Do not click it ten times in a row, or the system will lock you out!
Problem 2: The website is broken or super slow. You try to open the link, but the screen stays white forever.
Fix: This usually happens when millions of people try to register at the exact same time. The computers get too tired. The best thing to do is close the website and try again later. Trying early in the morning or late at night usually works perfectly because fewer people are awake.
Problem 3: ID is rejected. The website says your ID is not allowed.
Fix: Make sure you picked the correct ID name from the drop-down menu. If you picked “Passport” but uploaded a picture of your Driver’s License, the computer will get confused and say no.
How to Check If Your TM SIM Card is Fully Registered
Okay, you filled out the form, you uploaded the pictures, and you hit submit. Are you done? How can you be 100% sure that your TM SIM card is officially registered? There are two very easy ways to check.
The first way is to wait for a confirmation text message. A few minutes after you finish registering, TM will send a happy text message to your phone. It will say something like, “Congratulations! Your SIM is now registered.” Keep this text message safe!
The second way to check is to open the GlobeOne app. If you log into your account on the app, you can look at your profile settings. Right next to your phone number, there will be a little green checkmark or a label that says “Registered.” If you see that green checkmark, you can jump for joy! You have successfully followed the law and secured your mobile number.
How to Keep Your Registered SIM Card Safe
Now that your real name and identity are permanently connected to your TM SIM card, you need to protect it like a treasure. You cannot just give your SIM card away to a stranger anymore.
If someone borrows your SIM card and uses it to send bad scam messages, the police will think YOU did it, because your name is on the registry! So, never give or sell your registered SIM card to anyone you do not trust completely.
Also, you must protect your OTP codes. Scammers will sometimes call you and pretend to be from TM. They will say you won a prize and ask you to give them the 6-digit code sent to your phone. NEVER tell anyone your OTP. Real phone company workers will never ask for your password or your OTP. If your phone ever gets lost or stolen, you must call TM right away and ask them to block your number so the thief cannot use it.
More Fun TM Promos You Can Enjoy After Registering
Remember earlier when we talked about cool rewards? Let us look at a few more amazing deals you can enjoy now that your SIM is safe and registered. TM is loved by many Filipinos because their promos are very friendly to our wallets.
Aside from the awesome TM AN20 Promo we mentioned before, you can also try the “EasySURF” promos. EasySURF gives you a big chunk of mobile data so you can watch YouTube videos, scroll through TikTok, and play mobile games all day long.
If you are a student doing homework online, TM has promos that give you extra data just for educational apps and websites. If you love talking, there are promos that give you totally unlimited phone calls to any network for days at a time. The best part is that you can find all of these promos inside the GlobeOne app we downloaded earlier. You just tap a button, and the promo is yours!
Frequently Asked Questions (FAQs)
Even with a detailed guide, you might still have a few questions. That is completely normal! Let us answer some of the most common questions people ask about TM SIM registration.
Question: Do I have to pay to register my TM SIM card?
Answer: No, absolutely not! Registering your SIM card is 100% free. If anyone asks you to pay money to help you register, they are trying to trick you. Walk away immediately!
Question: Can I register more than one SIM card under my name?
Answer: Yes, you can! If you have two phones, or a phone and a tablet, you can register multiple TM SIM cards. You just have to do the process for each number, but you can use the same ID and selfie.
Question: I accidentally typed my birthday wrong. Can I fix it?
Answer: Yes, you can update your information, but it is a little tricky. You will need to open the GlobeOne app to edit your profile, or you might have to visit a physical TM or Globe store to ask a worker for help. That is why it is so important to type carefully the first time!
Final Thoughts on Registering Your TM SIM
Wow, we have covered a lot of ground today! We talked about why the law was made, what things you need, how to take great pictures, and exactly how to use the website and the app to get registered. We even learned how to solve common problems and keep our numbers safe from hackers.
Registering your TM SIM card might seem like a boring chore at first, but it is actually a wonderful thing. It helps kick the scammers out of our phones and makes texting our friends a safe and happy experience. Plus, it unlocks all those amazing internet and calling promos that TM is famous for.
If you have not registered your SIM card yet, do not wait another minute. Grab your ID, find a bright room, and click that link. It will only take five minutes of your time, and you will feel so proud of yourself when you see that green checkmark. Thank you so much for reading this step-by-step guide. Stay safe online, have fun chatting with your loved ones, and enjoy using your fully registered TM SIM card!